Creating a Background Screencast
by Alex MacCaw
Videos and screencasts can really help your customers get to grips with your product. However, actually getting people to play videos can be a source of friction—most aren't interested in spending five minutes of their time watching you describing the product.
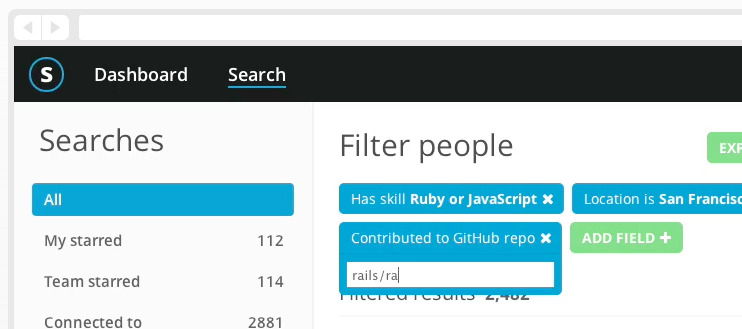
A good comprise between images and videos is the background screencast, a mute video that loads and plays asynchronously without any user interaction. You can see an example of this on the Sourcing.io site.
Making these background screencasts is pretty straightforward and in this article I'm going to you take you step by step through creating your own one.
Resizing
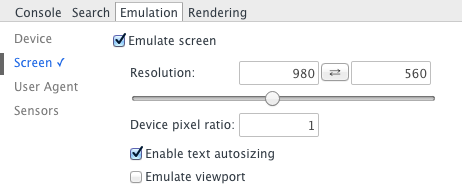
Firstly, we need to set our browser to the right dimensions. Chrome's developer release includes a useful utility for setting the exact resolution of the browser window. In this case I've set it to 980x560, dimensions that should be suitable for most monitor sizes.
Placeholder
Before we record our screencast, let's take a screenshot of the application (which will be identical to the first frame of the screencast). This will serve as our placeholder image to be displayed while the video is loading. On OSX, the easiest way to do this is via the keyboard shortcut ⌘ + shift + 4, drawing a selection around the appropriate area.
Recording
Next we need to record our screencast. The QuickTime Player actually has a little known screen recording feature. If you don't need the kind of control that more advanced programs like Screenflow give you, then I suggest you just use that.
Simply open Quicktime, and navigate to File > New Screen Recording. Drag a rectangle around the browser window, making sure it's the exact same dimensions as we set previously, and start recording your screencast.

Converting
When you save the Quicktime recording, it'll be saved in the MOV format. We'll need to convert it to some web friendly formats before we can use it in the browser.
I recommend the Miro video convertor — it'll convert our MOV video to the MP4, OGV and WebM formats, the three formats we need for Safari, Firefox and Chrome respectively.
Frontend
Once we've converted our recorded screencast into the MP4, OGV and WebM formats, we can start integrating the video into our site. We can do this with the HTML5 <video> tag. Add the markup below to your site, making sure to update the source paths as necessary.
<div class="screencast">
  <img src="/site/placeholder.png">

  <video preload="auto">
    <source src="/site/screencast.mp4" type="video/mp4">
    <source src="/site/screencast.ogv" type="video/ogv">
    <source src="/site/screencast.webm" type="video/webm">
  </video>
</div>
Notice we're specifying the preload attribute, which will ensure the video starts preloading as soon as our page loads. You'll also need to ensure the video files are served up with their correct content type.
Our video is preloading, but there are no controls for users to play the video once it's ready. Instead, we're going to listen to the canplay event, and start the video playing programmatically with jQuery.
$('.screencast video').on('canplay', function(e) {
  var $el = $(e.currentTarget);
  $el.addClass('playing');
  $el[0].play();
});

$('.screencast video').on('ended', function(e) {
  var $el = $(e.currentTarget);
  $el.removeClass('playing');
});
Notice we're also toggling the playing class depending on whether the video is playing or not. This will make more sense when we look at the CSS, where we're hiding the <video> element unless it has a playing class.
.screencast {
  position: relative;
}

.screencast video {
  position: absolute;
  top: 0px;
  left: 0px;
  display: none;
  user-select: none;
  pointer-events: none;
  display: none;
}

.screencast video.playing {
  display: block;
}
Notice too that the <video> element is absolutely positioned over the placeholder image. As soon as it's loaded, the video will be displayed and start playing directly over the placeholder image element.
Fallback is graceful; if the browser doesn't support the <video> tag than the canplay event won't be fired and users will instead just see the preview placeholder image.
On most mobile devices, the <video preload> attribute is disabled for networking reasons. Again, this is a graceful fallback, and one that makes a lot of sense (we don't want to waste precious data).
To improve load times, I uploaded all the video files to Amazon's CloudFront CDN. While the size of these videos only lies in the ~2mb range, we want them to load as fast as possible before the user loses interest and leaves the site.
Next steps
While I'm generally happy with this approach, I am a bit disappointed in the colors and quality of the video. Naturally the different formats vary, but they all suffer from this caveat one way or another. If you have any suggestions as to how to improve this than let me know.
A slightly different approach is documented by the author of Sublime, who details how to create animated PNGs. This has the advantage that every frame is pixel perfect, although with the obvious size disadvantages. I might use this approach in the future.